

Connect your WooCommerce store
This is the single most important step to get started: without a connection to your WooCommerce store, Vexel Sync has nowhere to send prices, stock, or products. You need two things: REST API keys from your store's WordPress admin, and two minutes to paste them into Vexel Sync's settings.
This is the single most important step to get started: without a connection to your WooCommerce store, Vexel Sync has nowhere to send prices, stock, or products. You need two things: REST API keys from your store's WordPress admin, and two minutes to paste them into Vexel Sync's settings.
Tip: you don't have to do this yourself. The Vexel team calls you within 24 business hours of your subscription payment to set up the connection together. But if you want to get started sooner, or you'd rather do it yourself, follow the steps below.
Step 1: Create REST API keys in WooCommerce
-
Log in to the WordPress Admin of your store.
-
Open the WooCommerce menu and click Settings.
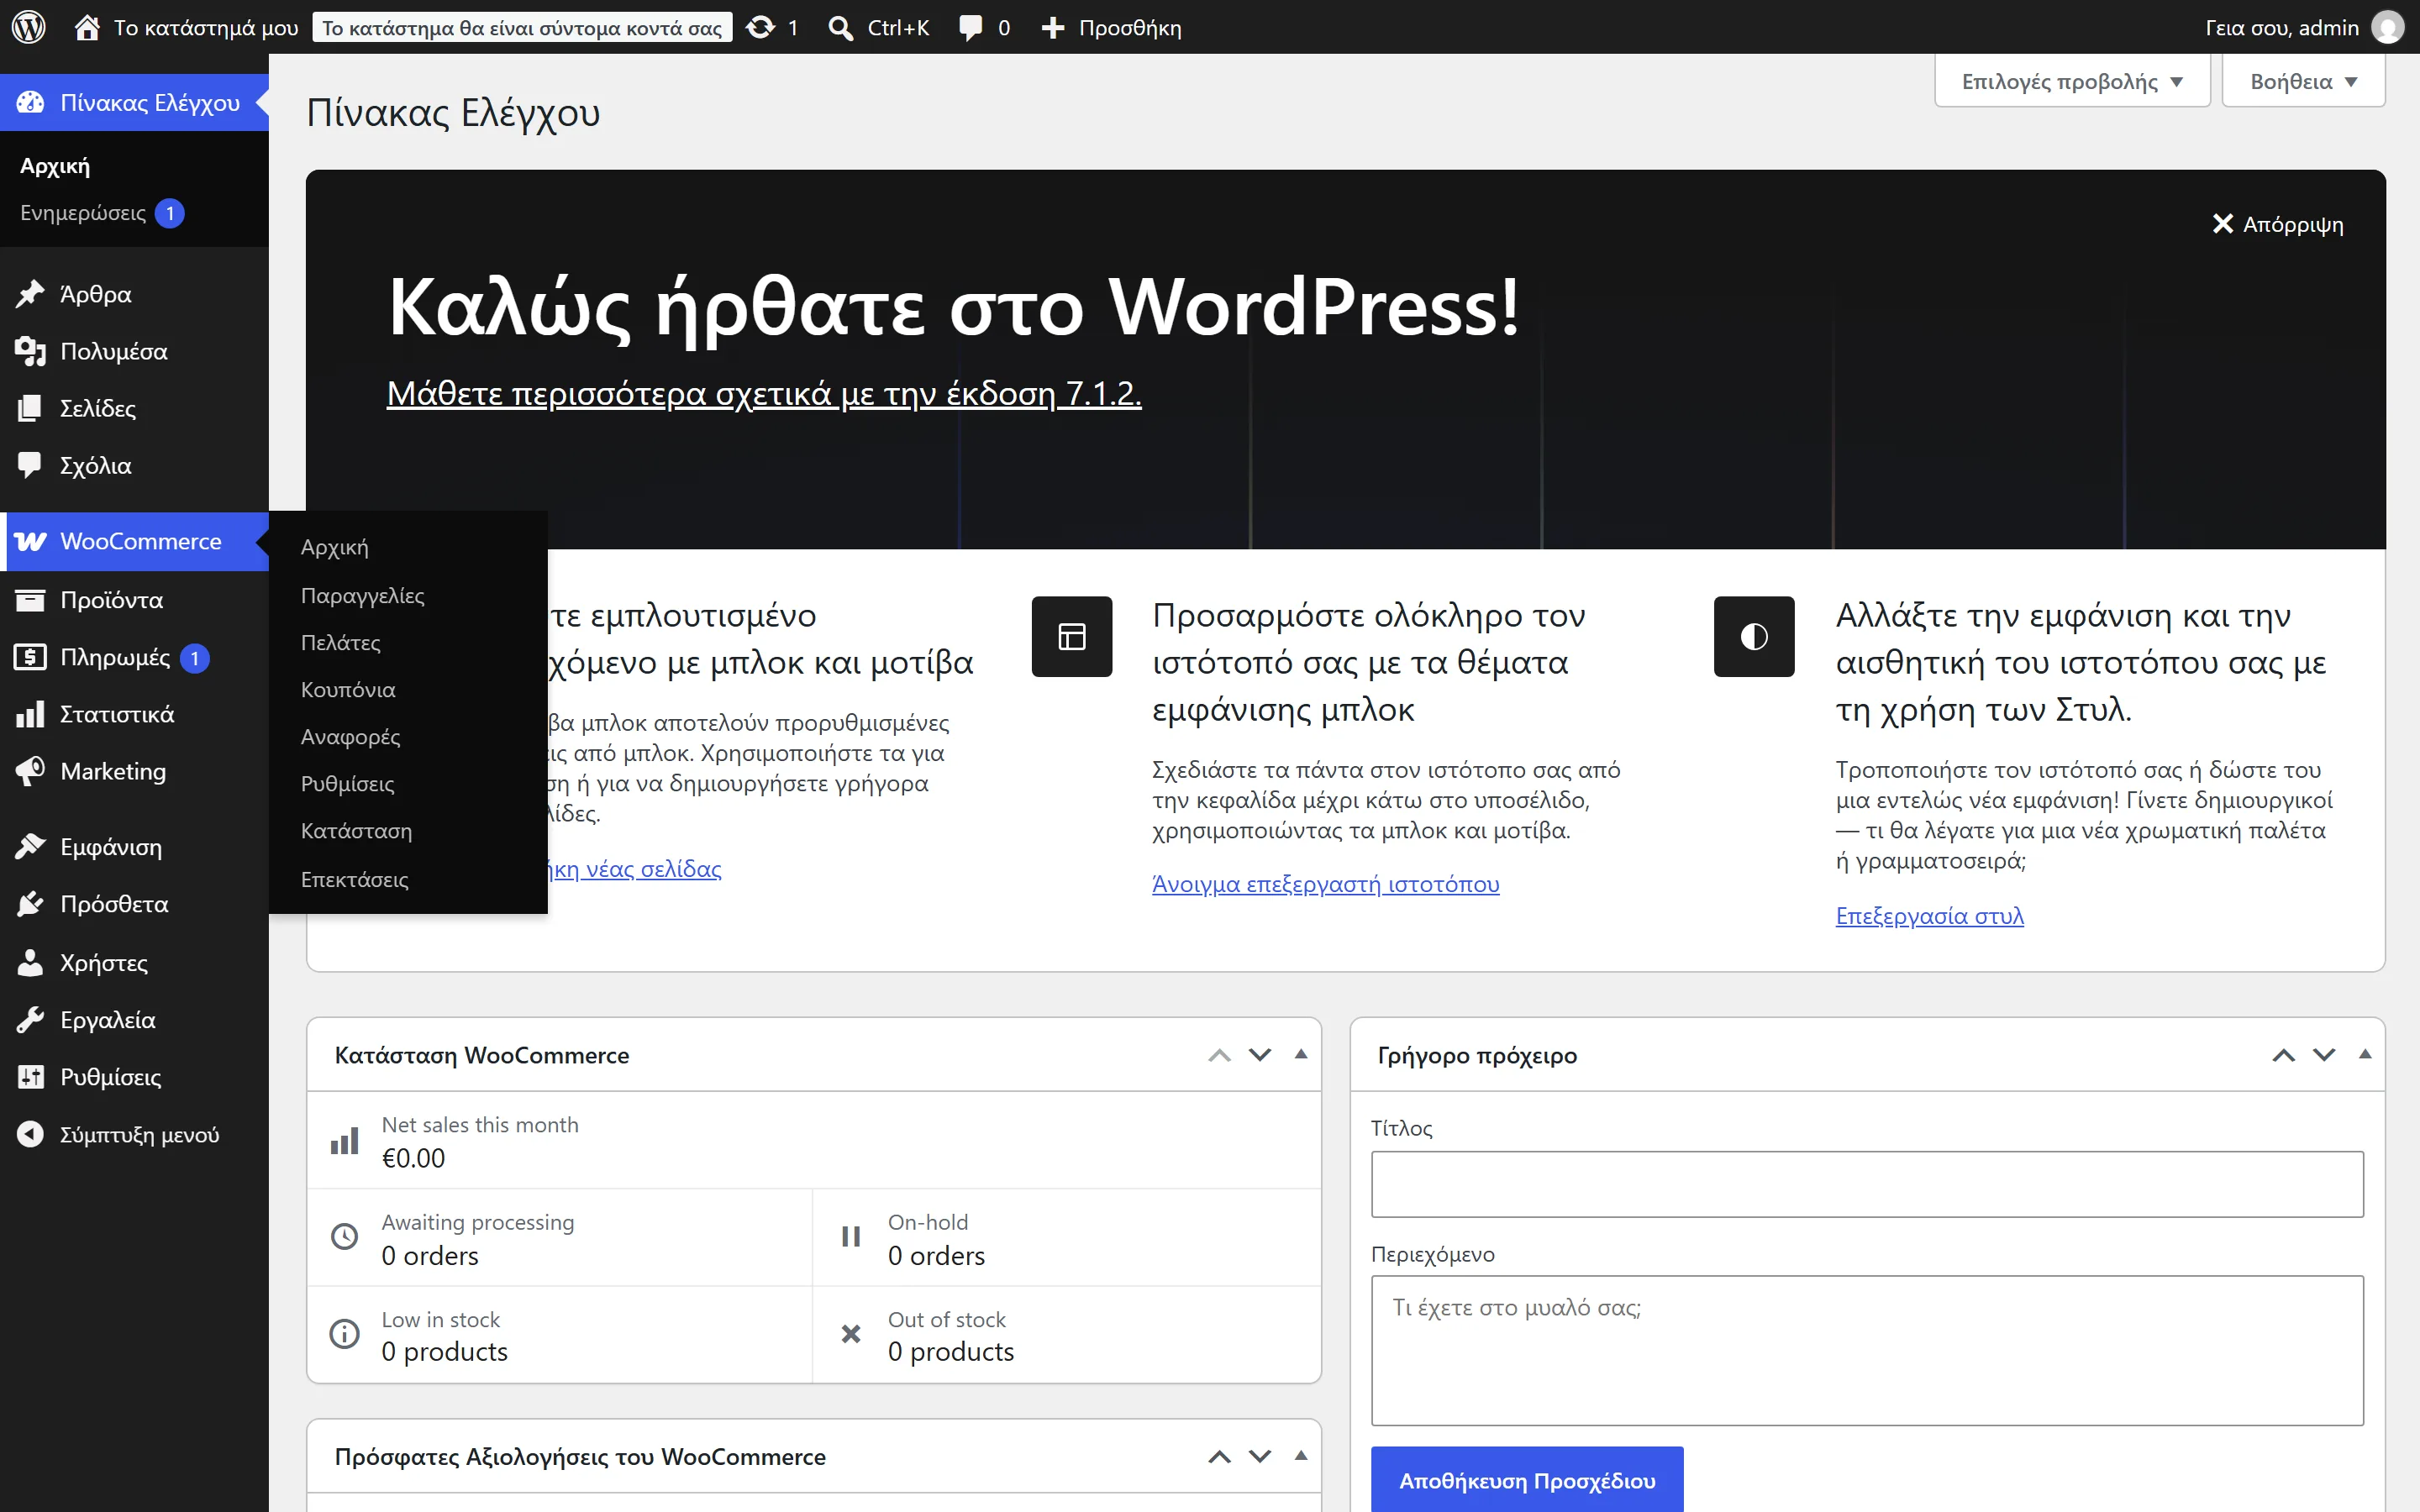
The WooCommerce menu in WordPress admin -
Click the Advanced tab, then the REST API keys sub-link (some admin languages, including Greek, leave this sub-link untranslated).
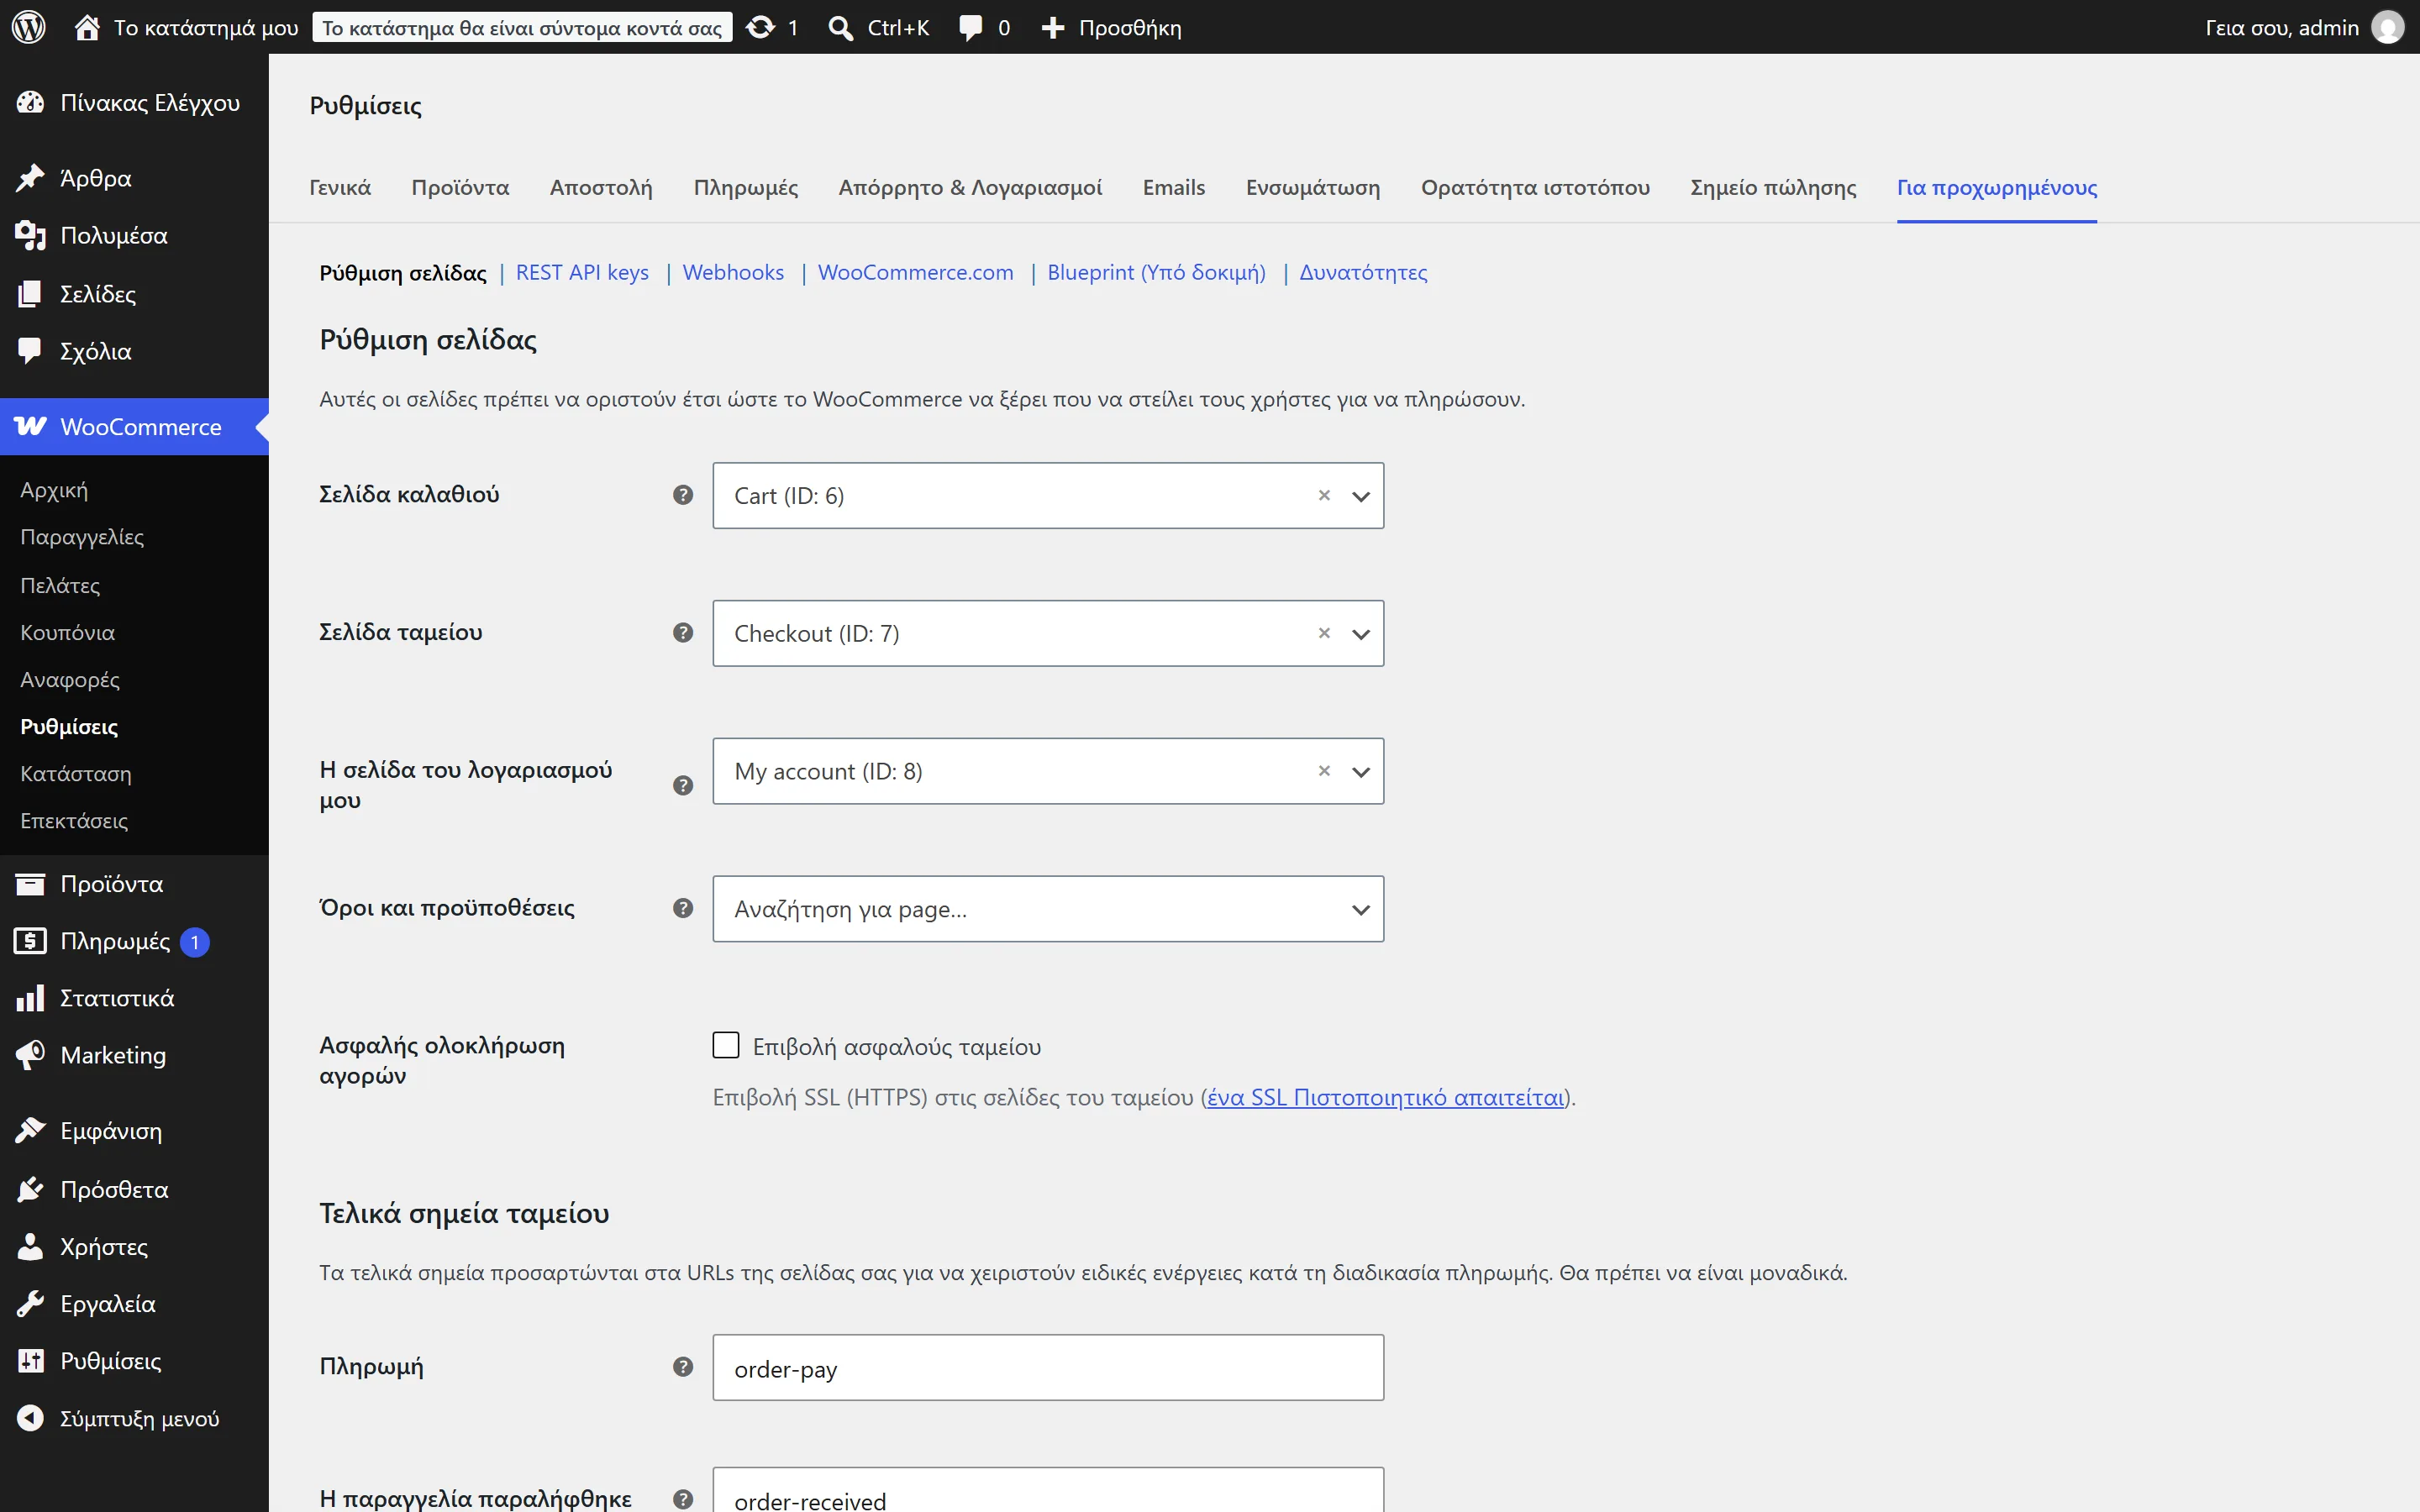
The "Advanced" tab, with the "REST API keys" sub-link -
Click Add key (or Generate API key if the list is empty).
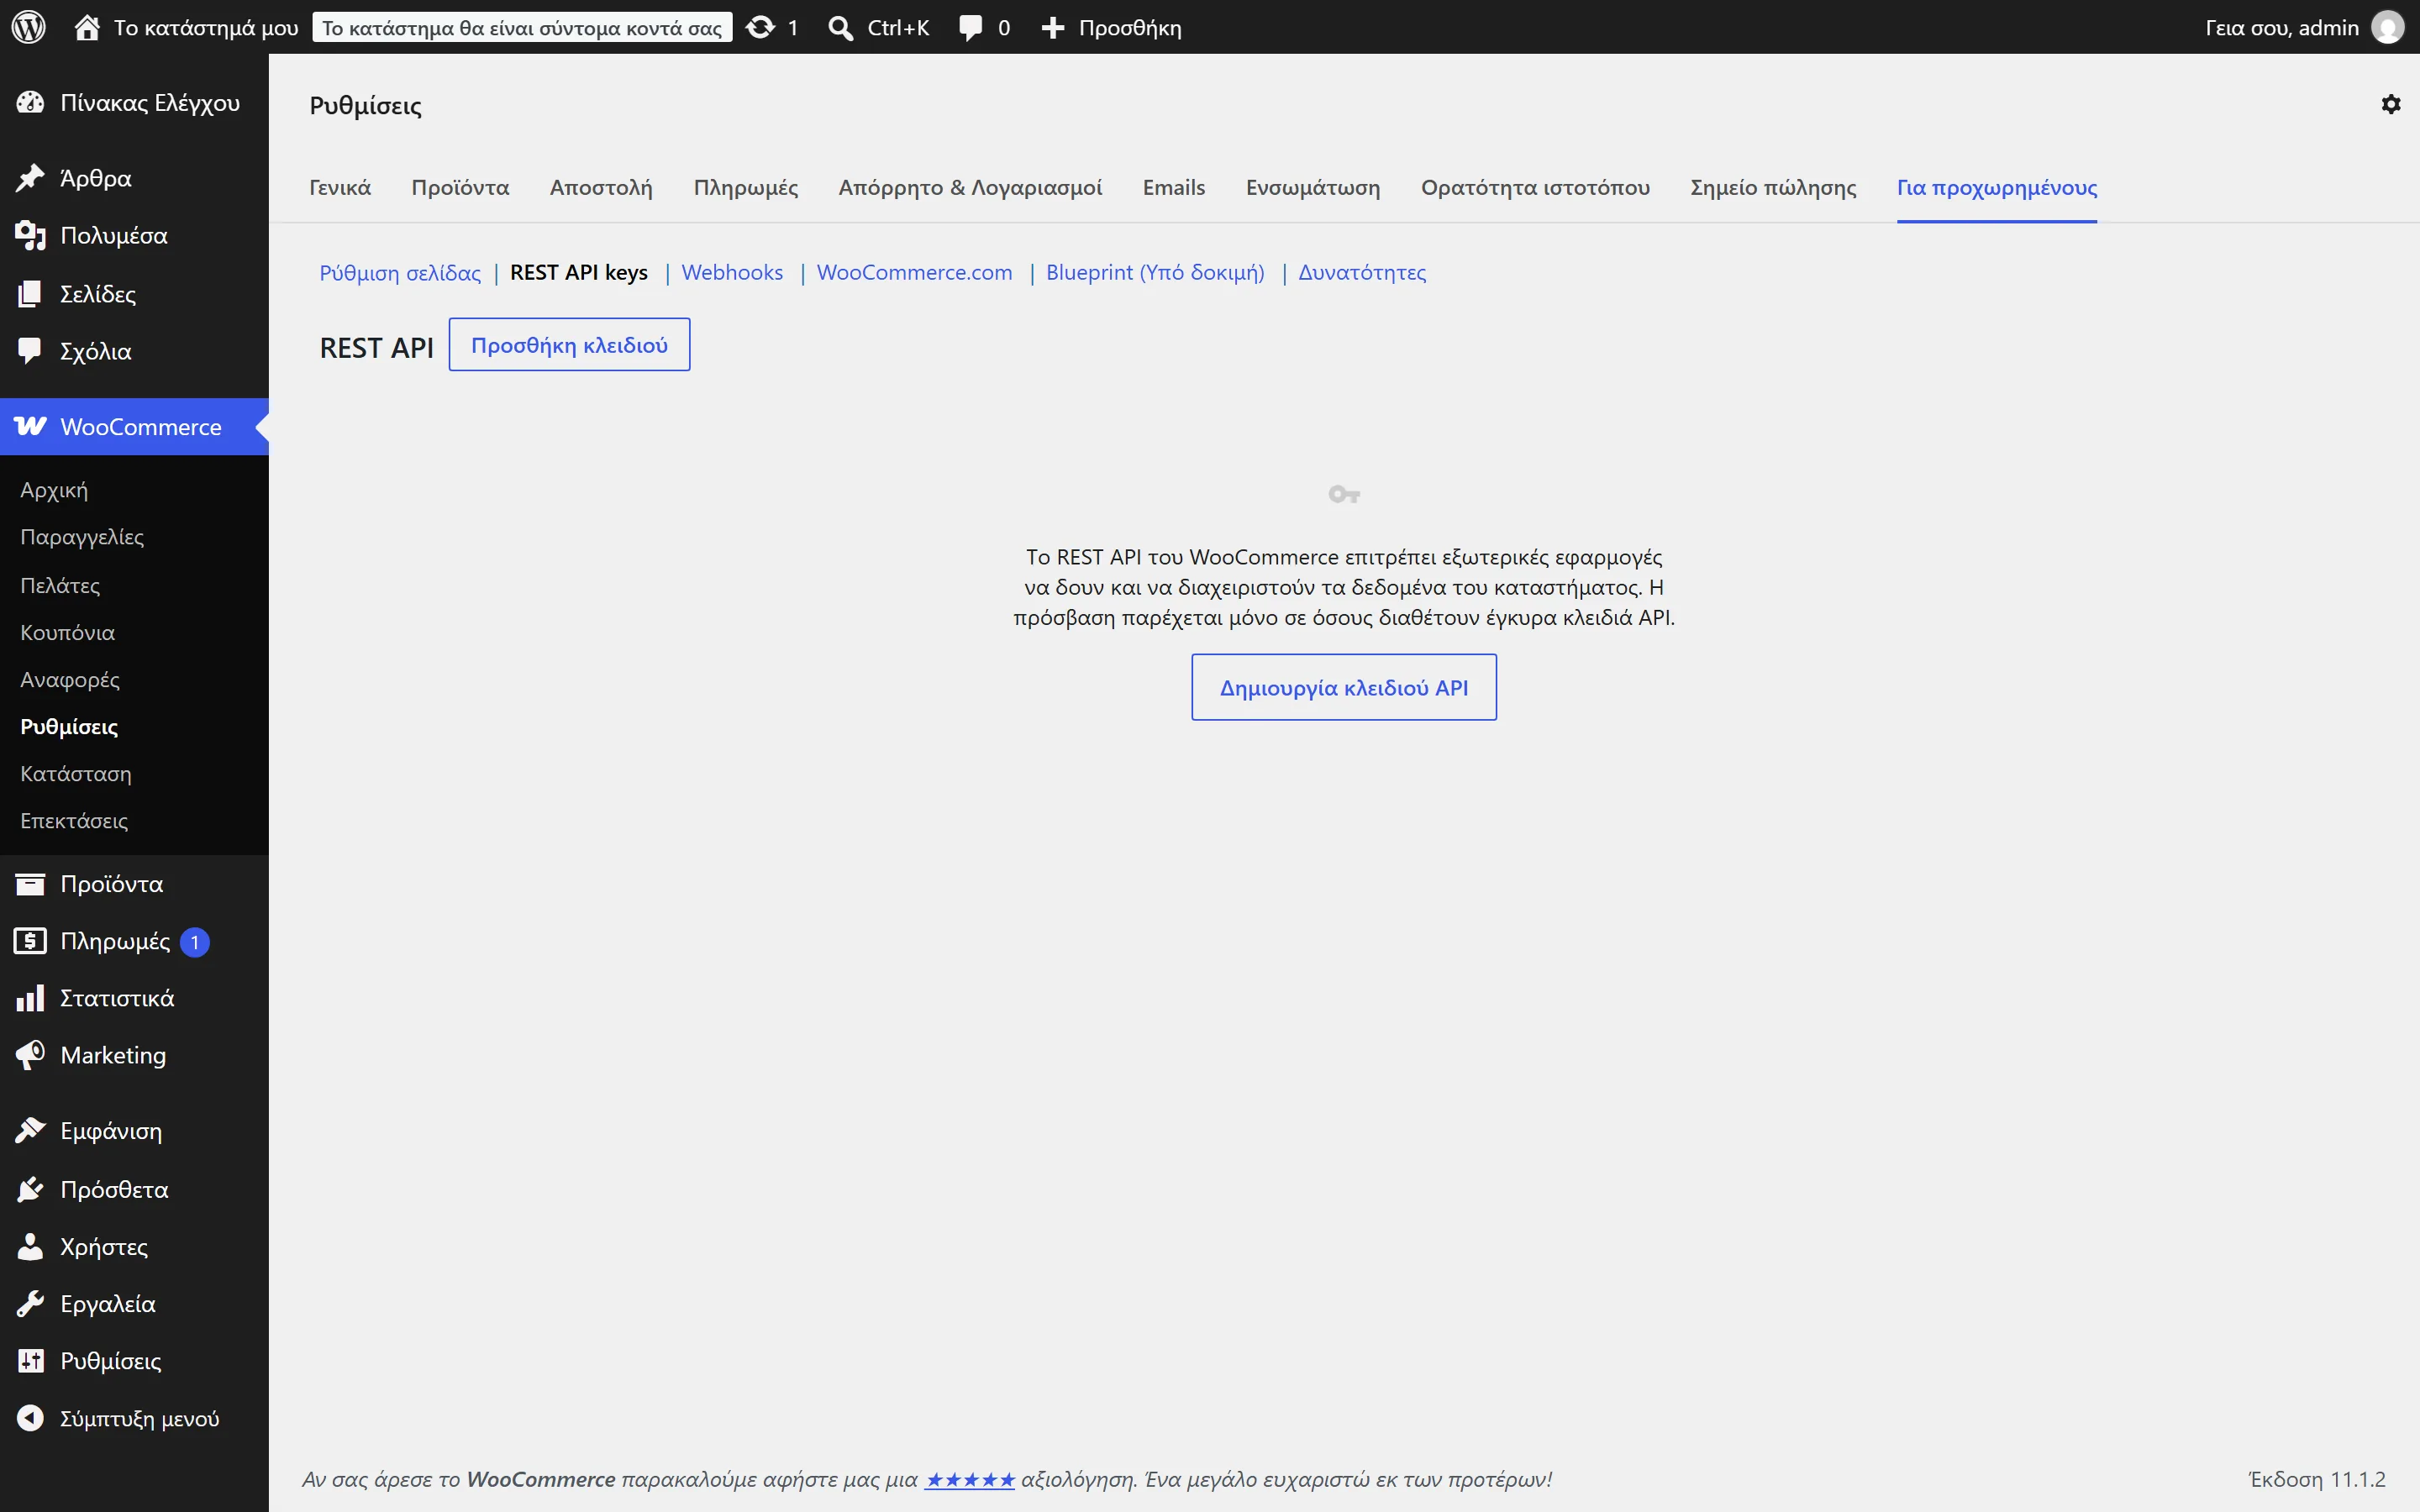
The REST API keys screen with the "Add key" button -
Fill in the key details:
- Description: something recognizable, e.g. "Vexel Sync".
- User: your admin account.
- Permissions: choose Read/Write. This is where the most common mistake happens: if you pick "Read" only, Vexel Sync will be able to read your products but not push price and stock updates.
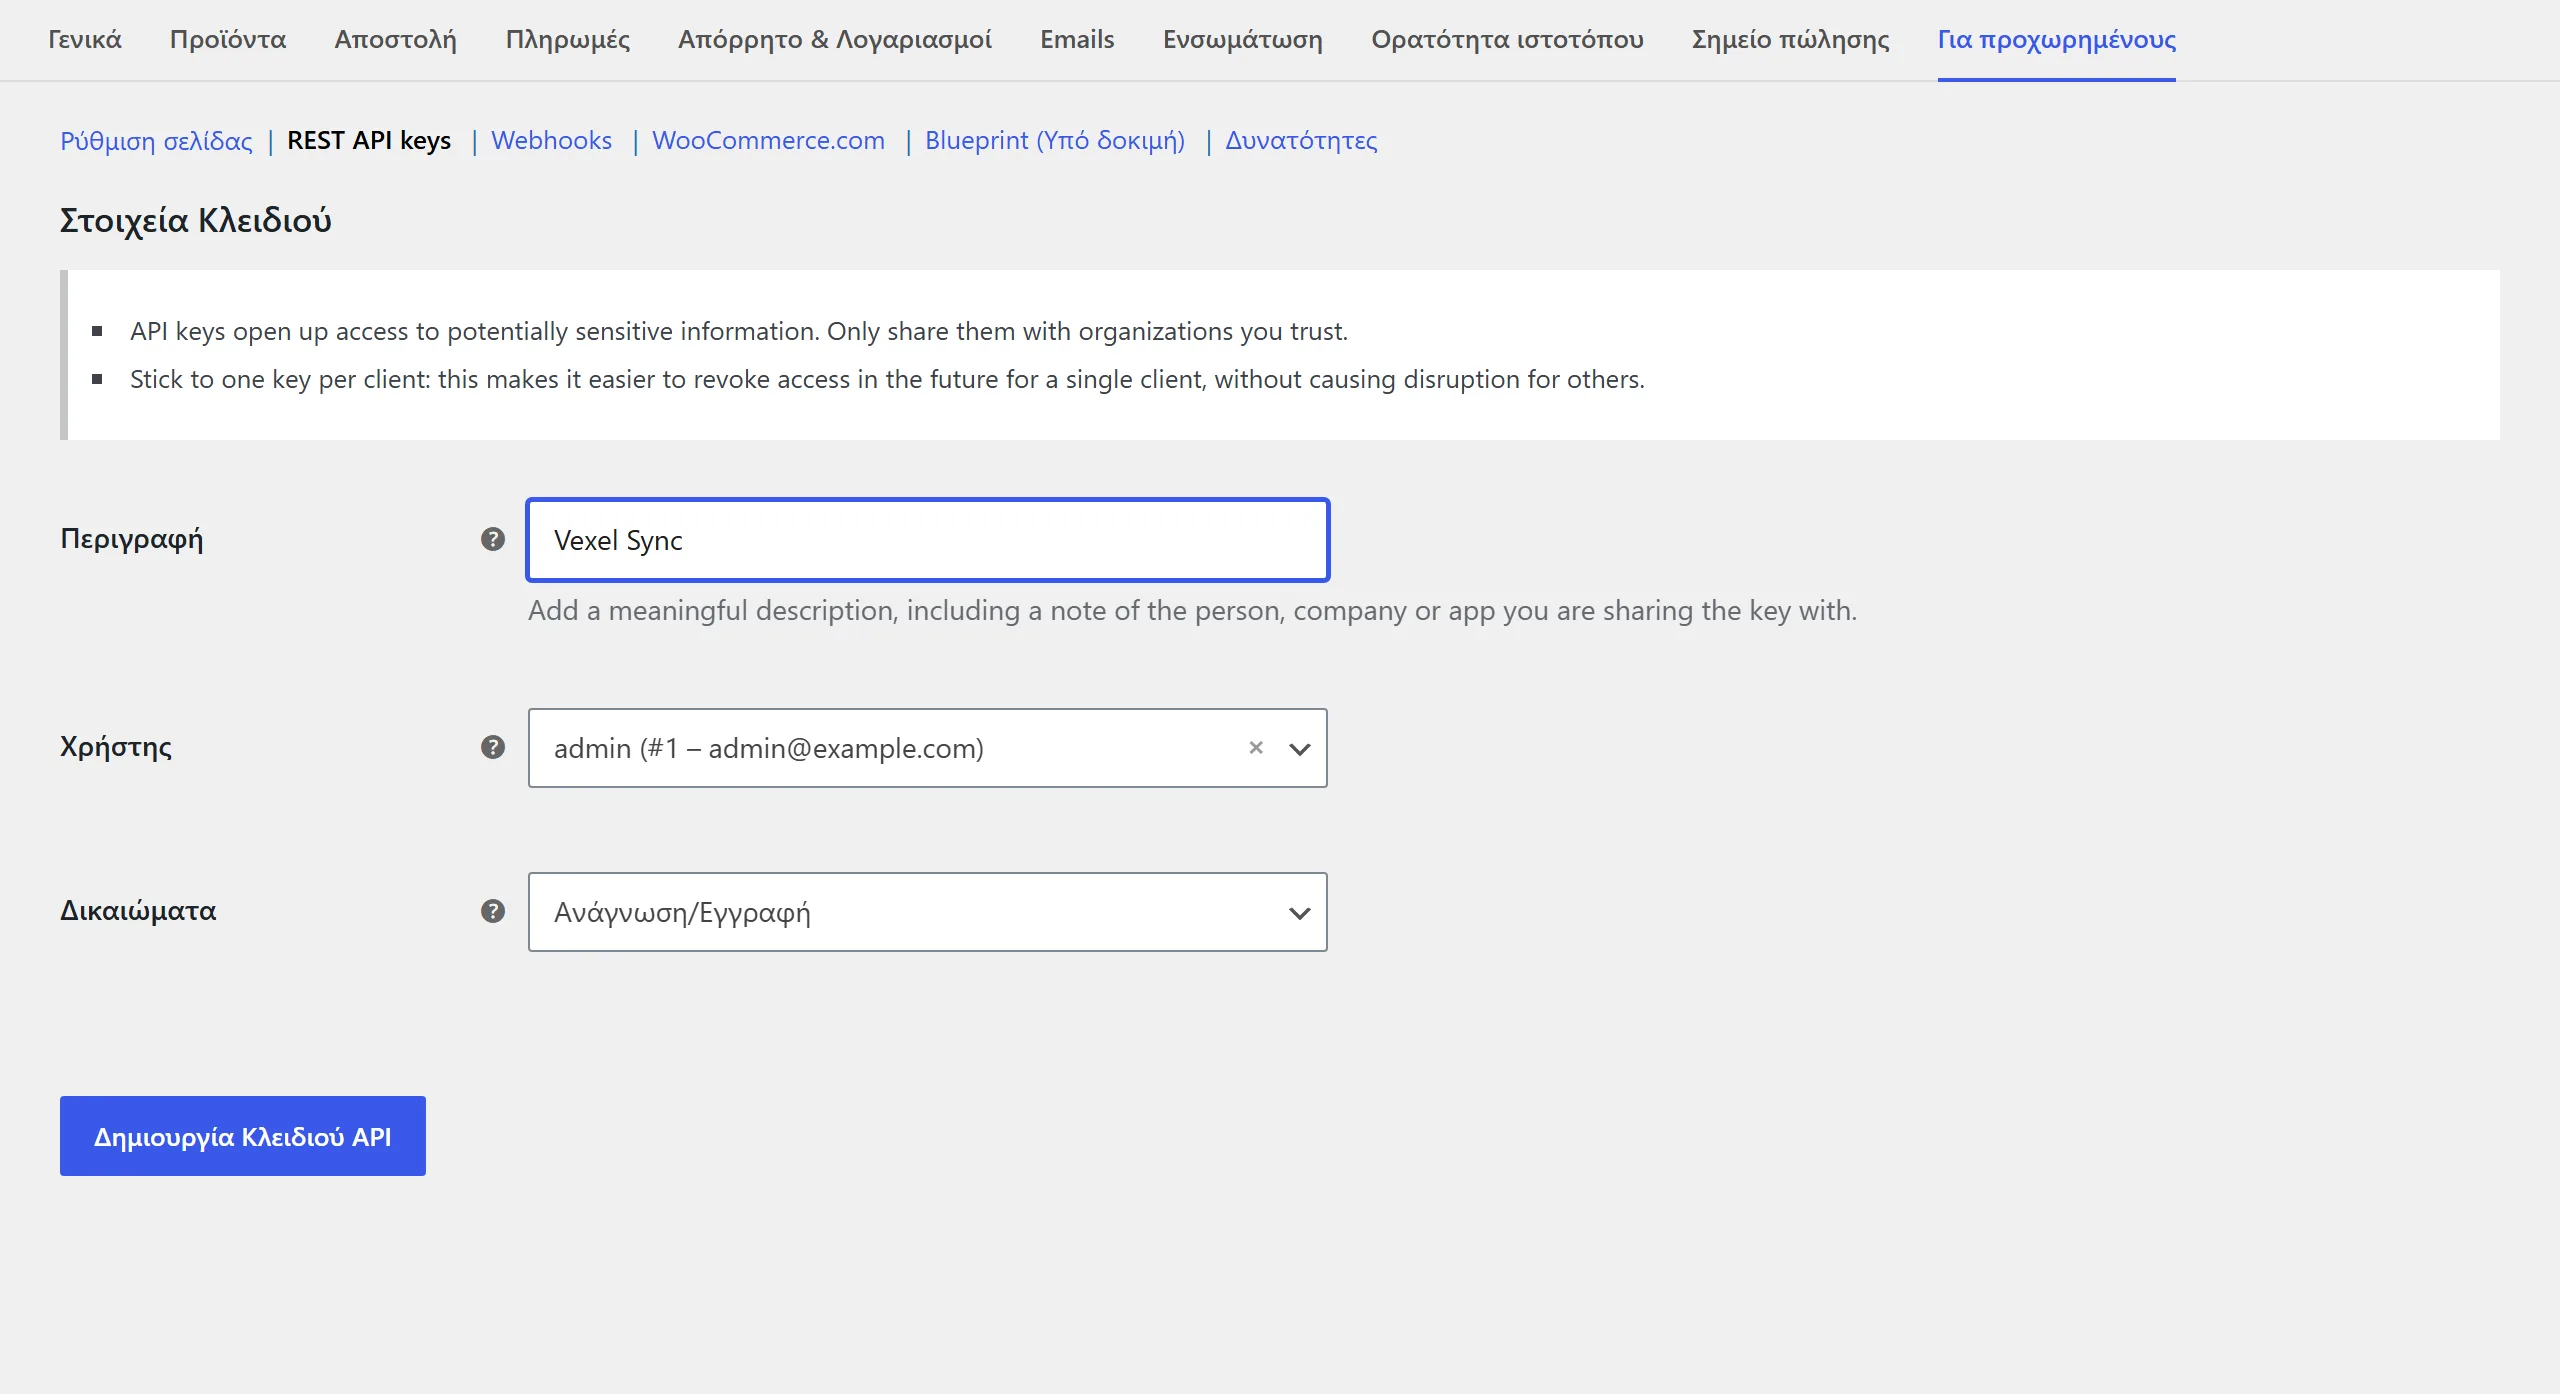
The key creation form filled in with Read/Write permissions -
Click Generate API key.
-
Copy the Consumer key and Consumer secret right away. They're shown only once: as soon as you leave the page, the secret is hidden. If you lose it, you'll need to create a new key.
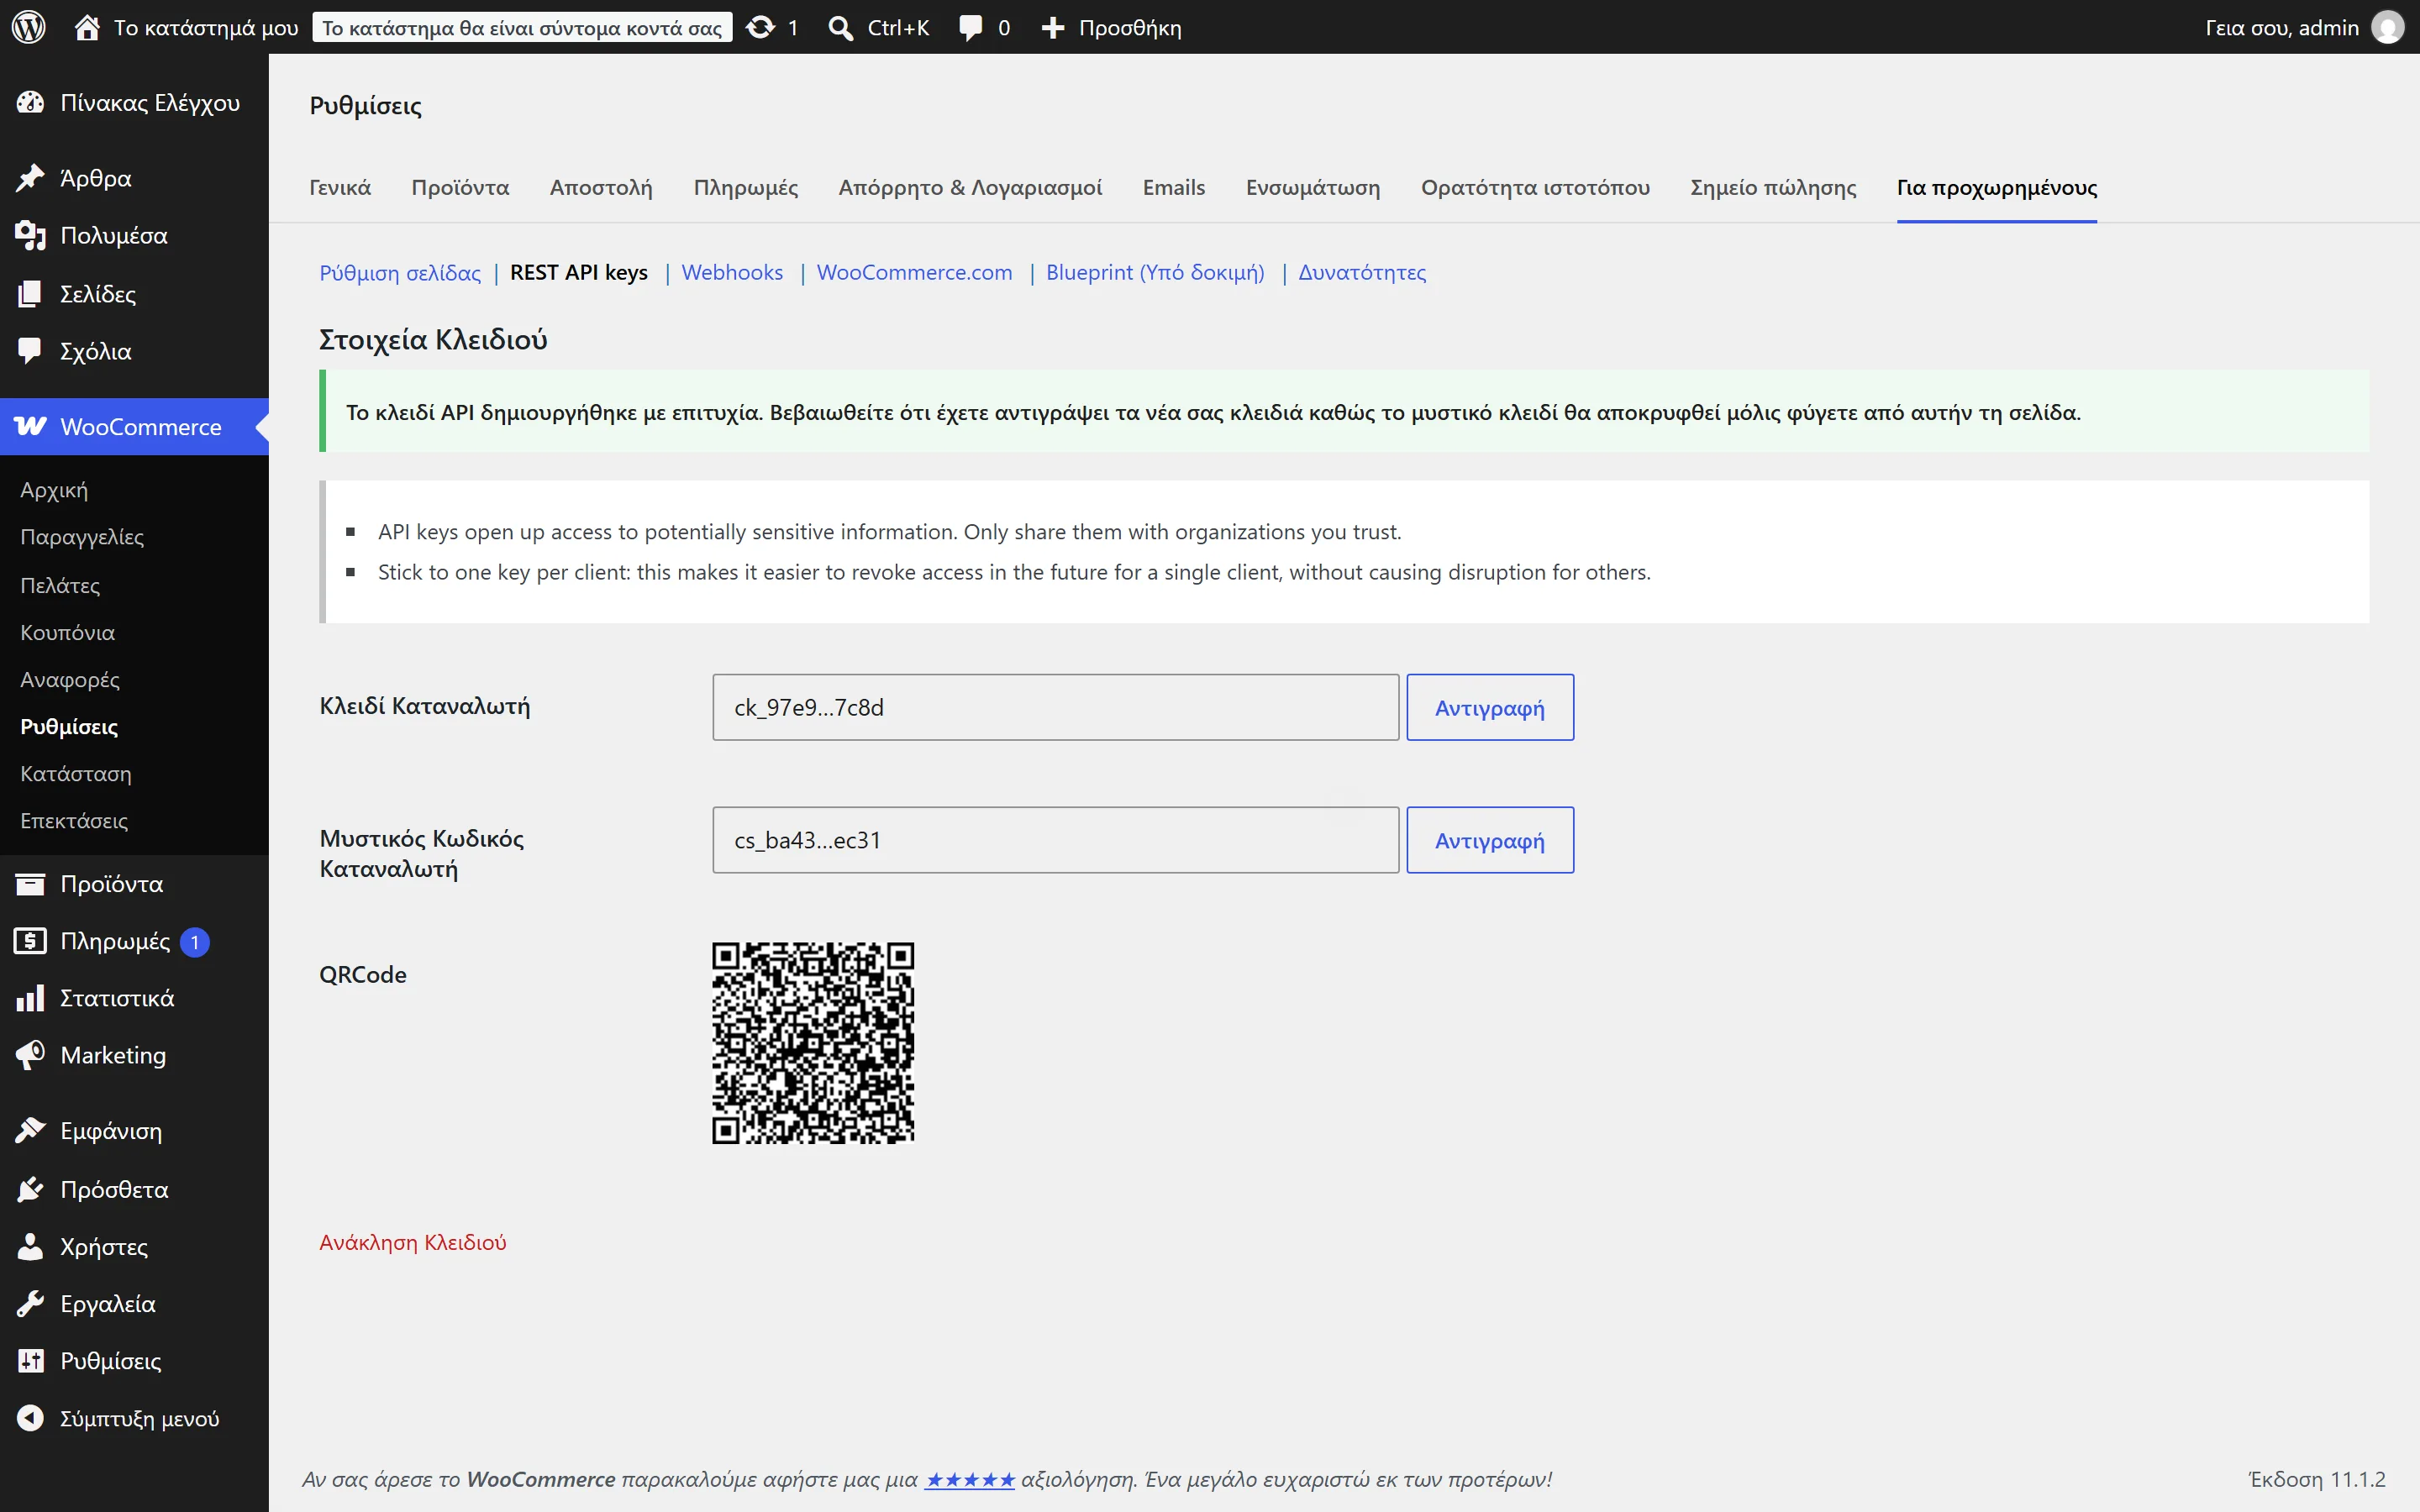
The generated key, with the Consumer key and Consumer secret
Step 2: Add the credentials to Vexel Sync
-
In Vexel Sync, go to Settings → Store.
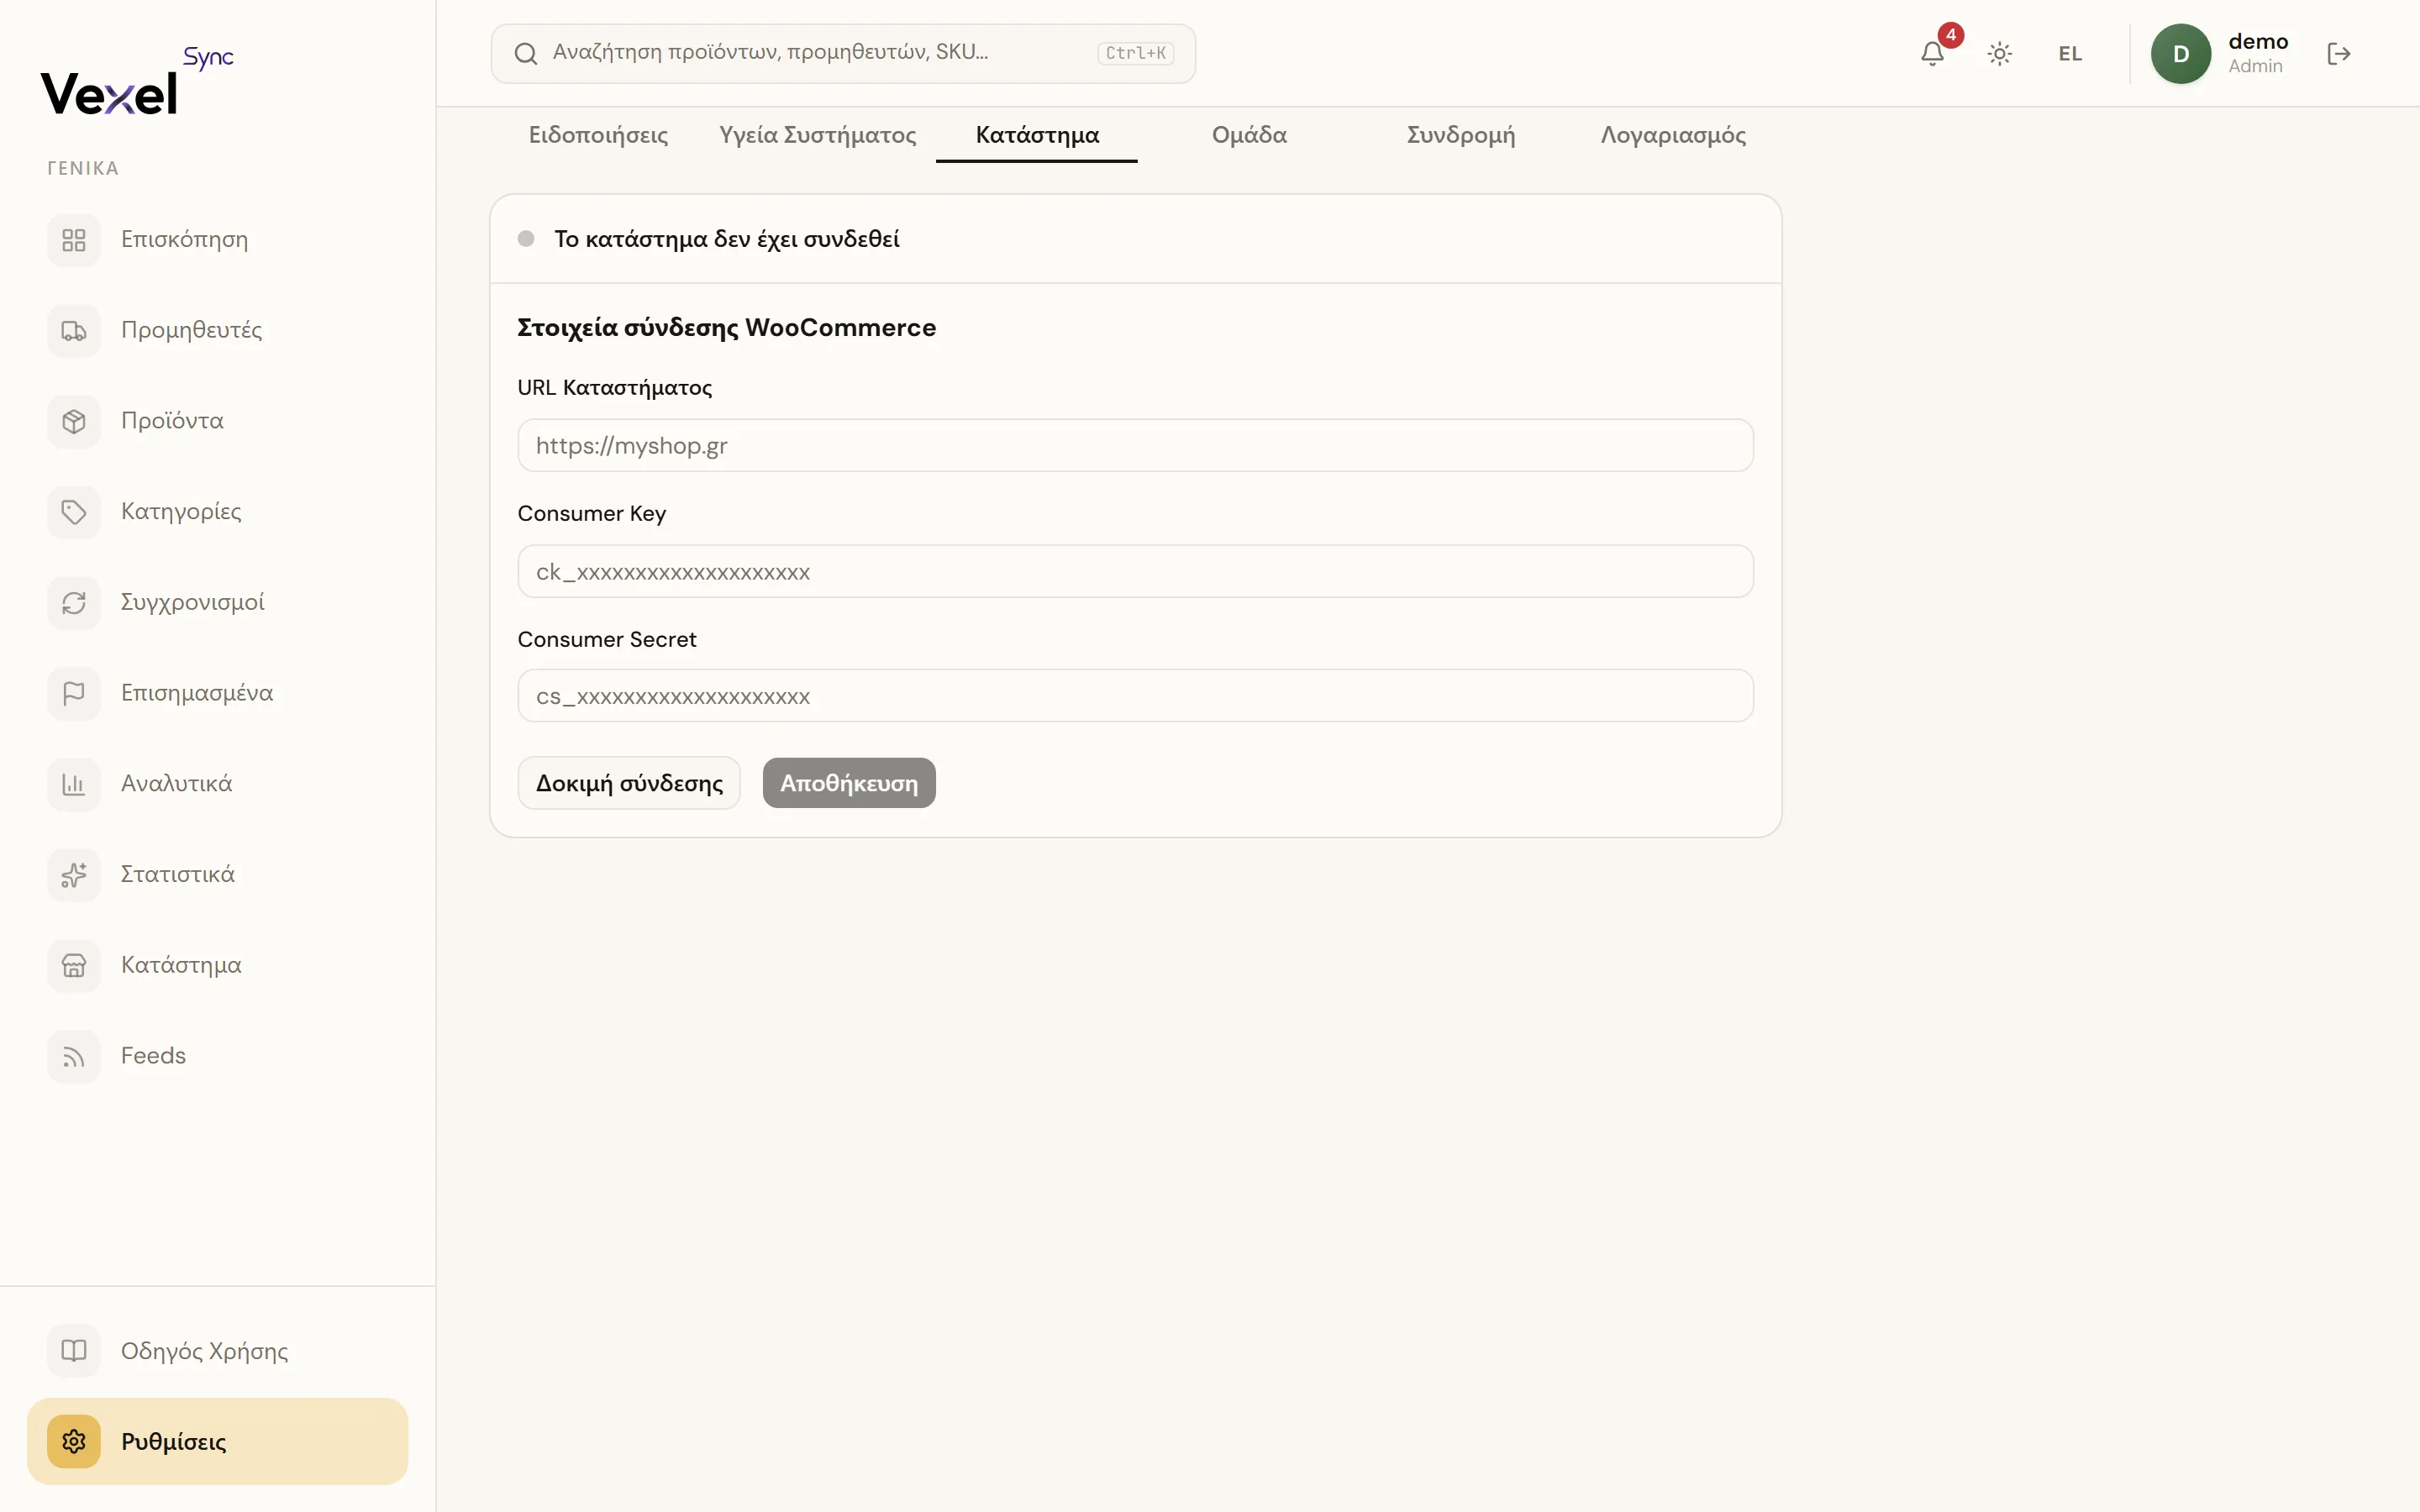
The store connection form in Settings, empty, exactly how a new customer sees it If you're still in the welcome steps, the same form is on step 3, "Connect your WooCommerce store".
-
Fill in:
- Store URL: your store's full address (e.g.
https://myshop.gr). - Consumer Key: the one you copied in Step 1.
- Consumer Secret: same.
- Store URL: your store's full address (e.g.
-
Click Test Connection. The system checks right away that the credentials work, by reading a product from your store.
-
If the test passes, click Save.
Once the connection is saved, you can move on to adding your first supplier.
Heads up: Test Connection only checks that Vexel Sync can read products. If your key has "Read" only permission, the test may pass but the first sync will fail when it tries to write prices and stock. Make sure you picked Read/Write in Step 1.
Troubleshooting
Wrong keys (401 or 403 error)
Vexel Sync will show "The WooCommerce key or secret isn't correct.". The Consumer Key or Consumer Secret is wrong, or the key was deleted in WooCommerce. Generate a new key (Step 1) and replace the credentials in Settings.
The test passes but sync fails to push changes
The key only has Read permission. Go to WooCommerce → REST API keys, edit the key (or create a new one), and set it to Read/Write.
The address doesn't respond as WooCommerce (404 error)
Vexel Sync will show "This address doesn't look like a WooCommerce store (REST API not found).". The URL isn't returning WooCommerce's REST API at /wp-json/wc/v3/. Common causes:
-
Permalinks are set to "Plain". WordPress's REST API needs "pretty" permalinks to work. Go to Settings → Permalinks and choose any structure other than "Plain" (e.g. "Post name", the recommended one), then click Save Changes there (that's enough to refresh the rules, even if you didn't change anything).
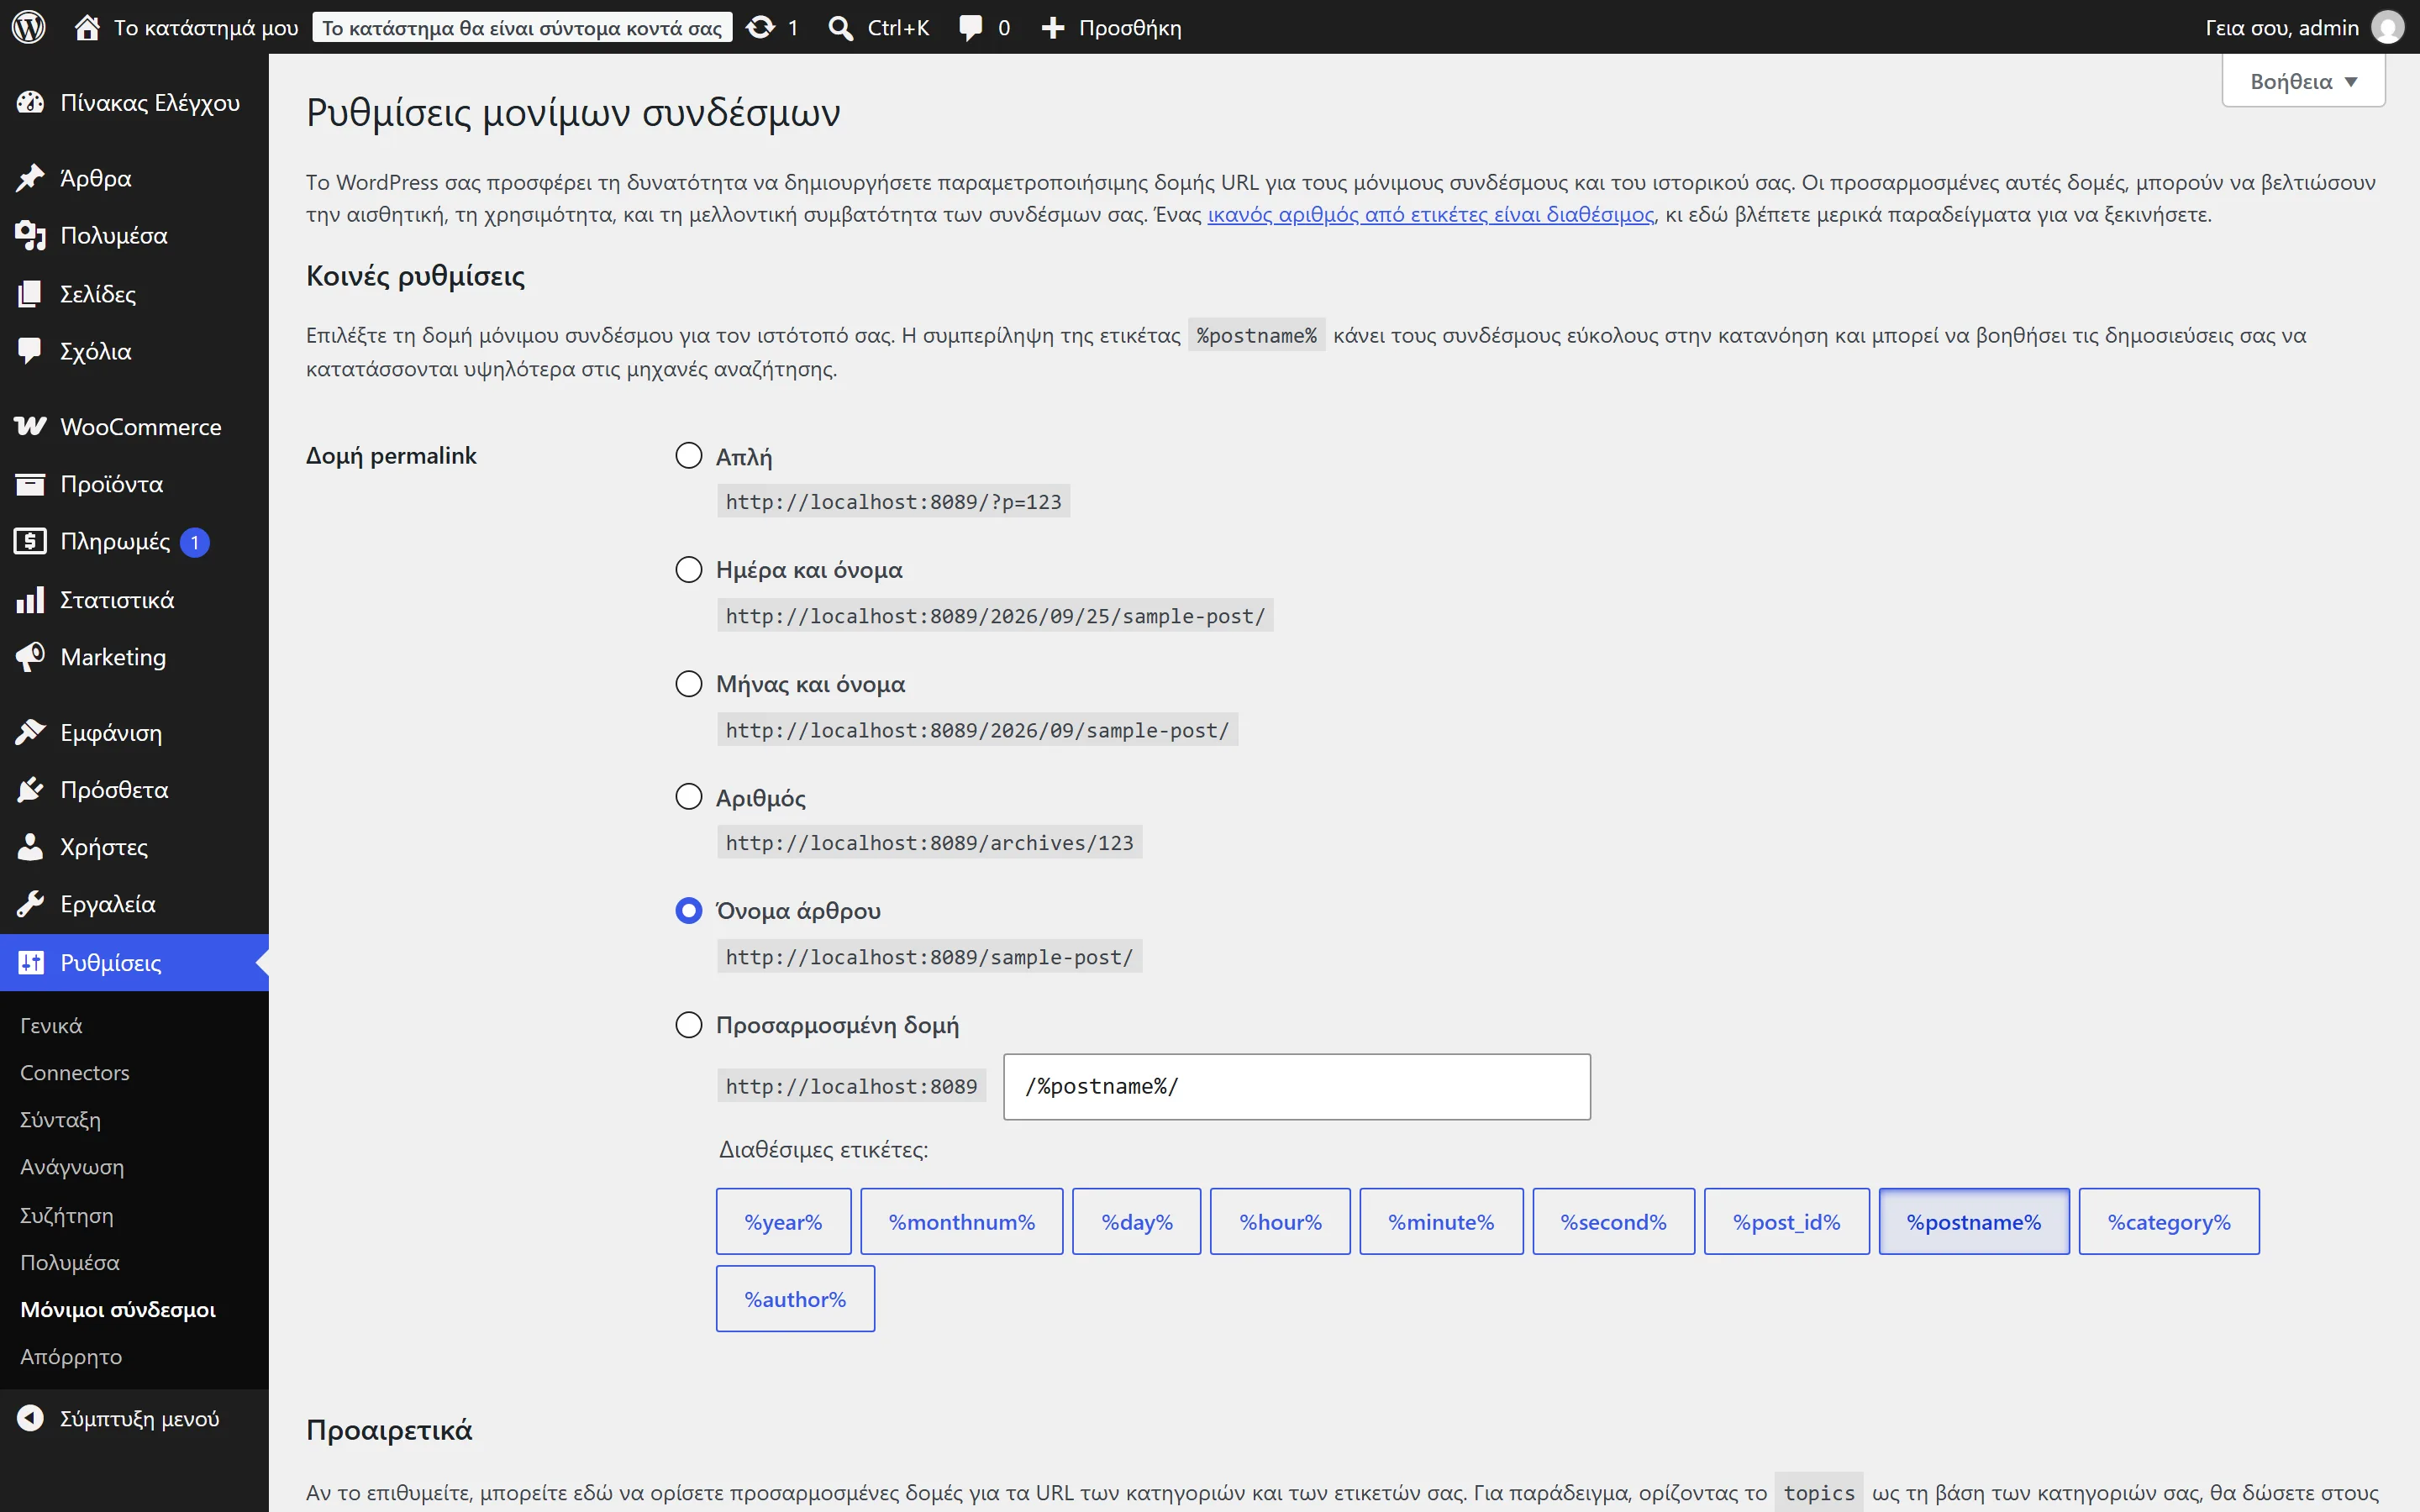
WordPress permalink settings, with "Post name" selected -
Wrong URL (e.g.
http://instead ofhttps://, or a missingwww). Copy the URL exactly as it appears in the address bar when you visit your store.
Your store needs to be on HTTPS
WooCommerce only accepts REST API keys over a secure connection (https://). If your store doesn't have an SSL certificate yet, enable one first (most hosting providers offer this for free).
A security plugin or firewall is blocking the REST API
Plugins like Wordfence, iThemes Security, or a server-level firewall can block requests to /wp-json/. Add an exception (whitelist) for /wp-json/wc/v3/ paths or for the API user, or ask your hosting provider how to do it.
Cloudflare
If your store is behind Cloudflare, make sure there's no rule (a WAF rule, Bot Fight Mode, or rate limiting) blocking requests to /wp-json/. Add an exception for that path if needed.
Want us to do it together? Book a call, email hello@vexel.gr, or call 231 777 3800.